
Staff Scheduling
Use the Staff Scheduler to manage weekly and monthly shifts, publish updates, and keep your staff schedule accurate.
What staff scheduling is for
Scheduling lets you decide who works which shifts and when. Use it to see coverage by week or month, avoid gaps, and make sure the right people are assigned to the right department at the right time.
The admin scheduler is designed for office and admin staff who plan staff coverage. You use it to view the current schedule, add or adjust shifts, move shifts between staff, publish changes, and print or review past publishes.
What you can do in the Staff Scheduler
Use the Staff Scheduler to manage day-to-day staffing without leaving the system:
-
See who is working in any week or month.
-
Add, edit, delete, or move shifts.
-
Assign shifts to specific staff or leave them as open shifts.
-
Filter by department and search for specific staff.
-
Publish schedule updates and choose who to notify.
-
Review publish history to see what was sent and when.
-
Print the schedule when you need a paper copy.
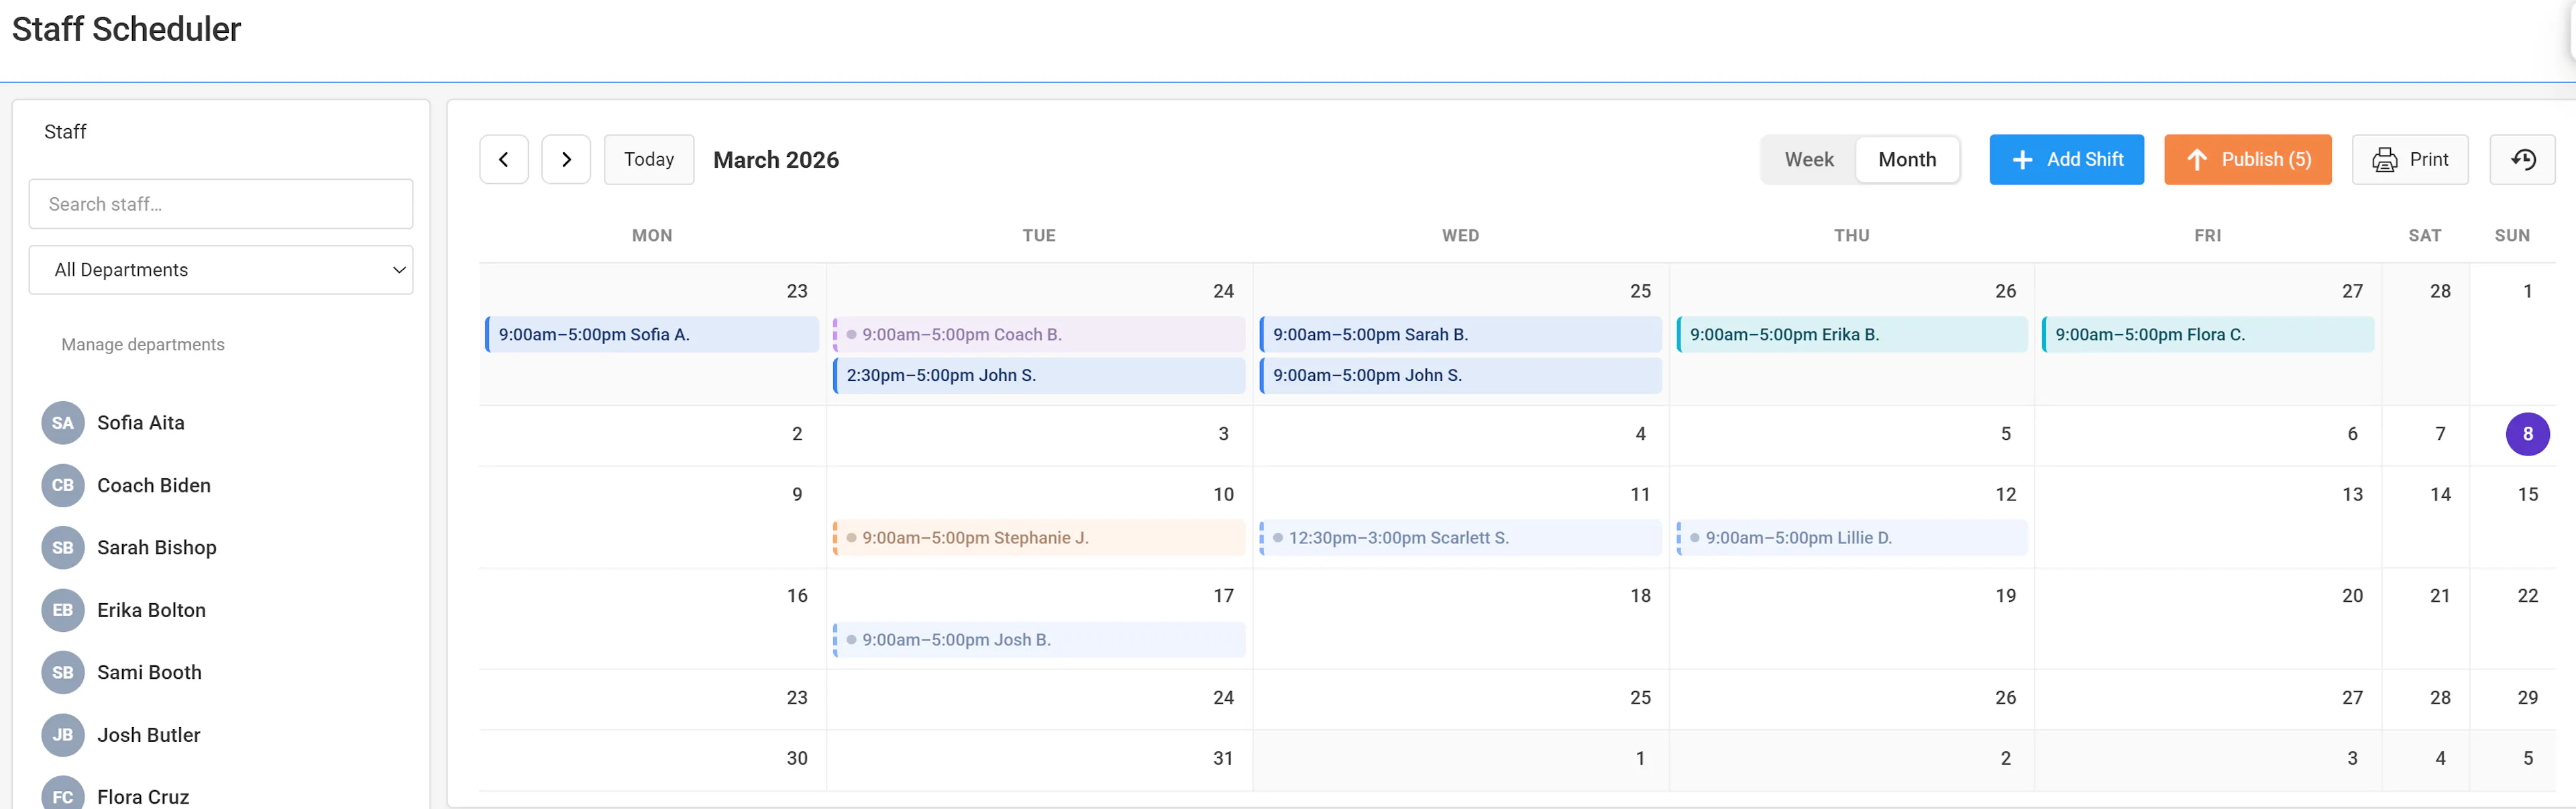
Understanding the scheduler screen
The admin scheduler page uses a two-column layout: a staff sidebar on the left and the main calendar on the right.
If something you expect is missing, check that you are on the admin scheduler page and that you have permission to manage staff schedules.
Staff sidebar
The sidebar helps you focus on the right people:
-
Staff list shows all staff who can be scheduled.
-
Staff search filters the list as you type a name.
-
Department filter lets you narrow the calendar to one department at a time.
-
A Manage departments link opens department settings so you can adjust which departments appear on the scheduler.
Changes you make in the sidebar update which staff and shifts you see in the main calendar.
Date controls and views
Use the date controls above the calendar to change what part of the schedule you are looking at.
-
Prev moves the view backward (one week or one month).
-
Next moves the view forward.
-
Today jumps back to the current week or month.
View options let you see more or less detail:
-
Week view shows a single week, with days across and staff and shifts within that week.
-
Month view shows all days in the selected month.
When you switch between week and month, the system remembers your choice for next time.
Schedule grid and shift blocks
The schedule grid is the main calendar area where you see shifts.
-
Each shift block shows the staff name (or "Open Shift"), the start and end times, and the department by color.
-
Shifts in different departments display in different colors so you can see coverage by department at a glance.
-
You can select a shift block to open its details, or drag it to move it to another day or staff row.
Use this grid to see who is working, where you need more coverage, and which shifts are still open.
Toolbars and actions
The toolbar above the calendar includes common actions:
-
Add Shift to create a new shift for a given day.
-
Publish (N) to publish your latest changes, where
Nis the count of unpublished changes. -
History to review past publishes and who was notified.
-
Print to print the current view of the schedule using your browser's print tools.
Hover over any icon to see its label, if your browser supports this.
Viewing the schedule
Use the schedule view to see who is working within a specific week or month.
Open the scheduling area
From the admin navigation, go to the Staff Scheduler page. Look for a label such as Scheduling or Staff Schedule.
Choose Week or Month view
Use the view toggle above the calendar to switch between Week and Month. Pick Week for more detail or Month for a broader overview.
Use Prev, Next, or Today
Select Prev or Next to move backward or forward in time. Use Today to jump back to the current week or month.
Filter by department or staff
In the sidebar, apply the Department filter to narrow the schedule to one department, and use Staff search to quickly find a specific person.
When the schedule loads, you should see staff names and their shifts as colored blocks on the calendar for the selected week or month.
Adding a shift
Add a shift when you need coverage on a specific date and time.
Decide the date, start and end times, department, and whether the shift will be open or assigned to a specific staff member before you create it.
Start a new shift
Use the Add Shift button or click an empty day cell in the schedule grid for the date you want. This opens the shift modal.
Set the date and times
In the modal, set the Date, then choose the Start time and End time from the dropdowns. Times appear in 30-minute increments.
Assign staff or leave it open
Use the Staff dropdown to select a staff member, or choose Open Shift to leave the shift unassigned for now. If you assign a staff member, a View profile link appears so you can open their profile in a new window.
Choose the department and notes
Select a Department for the shift so it displays with the correct color on the schedule. Optionally, add Notes to describe special duties or instructions.
Save the shift
Select Save Shift to create the shift. Confirm that the new shift block appears on the calendar on the correct date, with the correct staff member or as an open shift.
If the shift does not appear where you expect, check that you are on the correct week or month and that your department filter is not hiding it.
Editing a shift
Edit a shift when the date, time, staff member, department, or notes need to change.
Shifts use a single date and start and end times in 30-minute increments. If you change the date, the shift moves to that new day in the calendar.
Open the shift details
In the schedule grid, locate the shift and select its block. This opens the shift modal with the current details.
Adjust date and times
Update the Date, Start time, or End time as needed. Use the dropdowns to keep times aligned to 30-minute increments.
Change staff or department
Use the Staff dropdown to assign the shift to a different staff member or set it back to Open Shift. Update the Department if the shift belongs to a different department.
Update notes and save
Edit the Notes if you need to change instructions or add context. Select Save Shift and confirm that the shift block on the calendar reflects the updated date, time, staff, and department color.
If you assigned a staff member, use the View profile link in the modal to quickly open their profile in another window while you review their other details.
Moving shifts with drag-and-drop
Drag-and-drop lets you quickly move shifts without opening the modal first.
Drag a shift to a new day or staff row
In the schedule grid, click and hold a shift block, then drag it to a different day cell or staff row. Release the mouse to drop the shift in the new spot.
Review the updated shift
After moving, check that the shift now appears on the correct date and under the correct staff row. The department color and times remain the same unless you edit them separately.
Fine-tune details if needed
If you need to adjust the exact times or notes after moving, select the shifted block to open the modal and update the Start time, End time, or Notes, then save again.
If drag-and-drop does not appear to work, make sure you are clicking firmly on the shift block and dragging within the visible calendar area.
Deleting a shift
Delete a shift when it should no longer be worked.
Deleting a shift removes it from the schedule. Double-check the date, time, staff member, and department before you delete it.
Open the shift to delete
Find the shift block in the schedule grid and select it to open the shift modal.
Use the Delete option
In the modal, select Delete. This button only appears when you are editing an existing shift, not when you are creating a new one.
Confirm the deletion
If a confirmation appears, confirm the deletion. The shift should disappear from the calendar for that date and staff member.
If you delete the wrong shift, recreate it with the same date, times, staff member, department, and notes, then publish again so staff see the correction.
Managing departments from the scheduler
Use the Manage departments link to keep your department list aligned with how you schedule staff.
Open department management
In the staff sidebar, select the Manage departments link. This opens the department management page in a new window or tab. Departments are one of your profile fields that Campium has created for you.
Adjust departments
Add, edit, or deactivate departments as needed according to your organization's structure and naming.
Return to the scheduler
Go back to the scheduler page and refresh if necessary. Confirm that new or updated departments appear in the Department filter and the shift Department dropdown.
When you assign a department in the shift modal, the shift block uses that department's color in the schedule grid.
Publishing the schedule
Publishing makes your latest changes visible to staff and, if you choose, sends them email notifications.
Think of publishing as releasing a new version of the schedule. You can make multiple edits in the scheduler, then publish them together once you are ready.
Review the unpublished count
Look at the Publish (N) button in the toolbar. The number N shows how many changes are waiting to be published.
Open the publish modal
Select Publish. The publish modal appears and shows options for who to notify about these changes.
Choose a notification option
Select one of the notify modes:
-
Notify only staff with new or changed shifts — Email only staff whose shifts are part of this publish.
-
Notify all staff with upcoming shifts — Email every staff member who has an upcoming shift on the schedule.
-
Do not notify anyone — Publish the changes without sending any emails.
Confirm publishing
Select Publish in the modal. The system applies your changes to the staff-facing schedule and sends any emails based on the option you chose. The number on the Publish button resets when publishing completes.
If staff say they do not see a change you made, check the Publish (N) button to confirm that N is zero and publish again if needed.
Viewing publish history
Publish history helps you see what was published, when, and who was notified.
Open publish history
In the scheduler toolbar, select the History button or icon. This opens a modal listing past publishes.
Review past publishes
Look through the list to see each publish date, who performed the publish, and the notification choice (who received emails).
Use this list when you need to confirm which version of the schedule staff received or verify that an email notification went out.
Printing the schedule
Printing lets you create an offline copy of the schedule using your browser's print tools.
Set up the view you want to print
Choose Week or Month view and use the Prev, Next, and Today controls to show the date range you want to print. Apply any department filter you want reflected in the printout.
Open the print dialog
Select the Print button in the scheduler toolbar. Your browser's print dialog opens with a preview of the current schedule view.
Confirm and print
In the browser print dialog, adjust settings such as layout or scaling if needed, then confirm to print. Check the printed copy to ensure dates, times, and staff names are clear.
The printed schedule reflects exactly what you see on-screen, including the current view and department filter.
Troubleshooting common scheduling issues
Use this section when something on the admin scheduler does not look right or you cannot make the change you expect.
-
Confirm you are viewing the correct Week or Month and that you did not move to a different date with Prev or Next.
-
Check the Department filter in the sidebar; if it is set to another department, the shift may be hidden.
-
Search for the staff member in the sidebar to focus on their row, or look for Open Shift if the shift is unassigned.
-
Try refreshing the page and checking again for the staff member and date.
-
Select the shift block to open the modal and verify the Staff and Department fields.
-
If you meant to move the shift, drag and drop it to the correct staff row or edit the Staff field, then save.
-
Update the Department so the shift displays with the correct color in the schedule grid.
-
Publish your changes so staff see the corrected assignment.
-
Make sure you are selecting the shift block itself in the schedule grid so the modal opens.
-
Check that you have admin access to manage staff schedules on this page.
-
Try editing a different shift; if that works, there may be an issue with the specific shift you are trying to change.
-
If you still cannot update it, contact a system administrator to review your permissions or the schedule data.
-
Look at the Publish (N) button; if
Nis greater than zero, you still have unpublished changes. -
Select Publish (N), choose an appropriate notification option, and complete the publish.
-
Use History to confirm that the publish recorded correctly and that notifications were sent if you selected them.
-
Ask staff to refresh their schedule view or log out and back in if they still do not see changes.
-
Confirm you are on the same Week or Month and with the same Department filter before you select Print.
-
In the browser print preview, check scaling or orientation settings that might cut off days or staff rows.
-
If needed, switch between Week and Month view and try printing again to get the layout you prefer.
Good habits for accurate schedules
Keep these habits in mind to maintain a clear, reliable staff schedule in the admin scheduler:
-
Review the upcoming week in Week view to confirm coverage and spot gaps.
-
Use departments consistently so the schedule colors match how your teams work.
-
Create shifts as Open Shift when you know coverage is needed but have not chosen a staff member yet.
-
Update shifts as soon as you learn about changes, then publish so staff see the latest version.
-
Use the History button to confirm publishes, especially before you send follow-up messages to staff.
-
Plan a regular time to publish new schedules so staff know when to check for updates.
-
Print the schedule when necessary, but treat the published online schedule as the source of truth.